Sunday 12 July 2015

Mandarin, pistachio and chickpea cake

My Imperial Mandarin tree has it's first fruit on it this year. Correction, it's first fruit that has stayed on  to the point of being edible. We ate the second one yesterday. The second was a bigger celebration because the first fell off too early and it was so bitter I pulled faces like eating a lemon. This time it was sweet and juicy, the thick skin peeled away easily, and even all the stringy pith seemed to just come away with it.


Now, as with any eager gardener I envisage an optimistic future where this tree will be loaded down with so many of these beautiful mandarins that I will be struggling to use them all up, the glut would be so bad that I'd be looking for different things to do with them. So, in preparation for this, I've been dreaming about what I could possibly do with them, and being a sweet tooth, cake is always high on the options list.

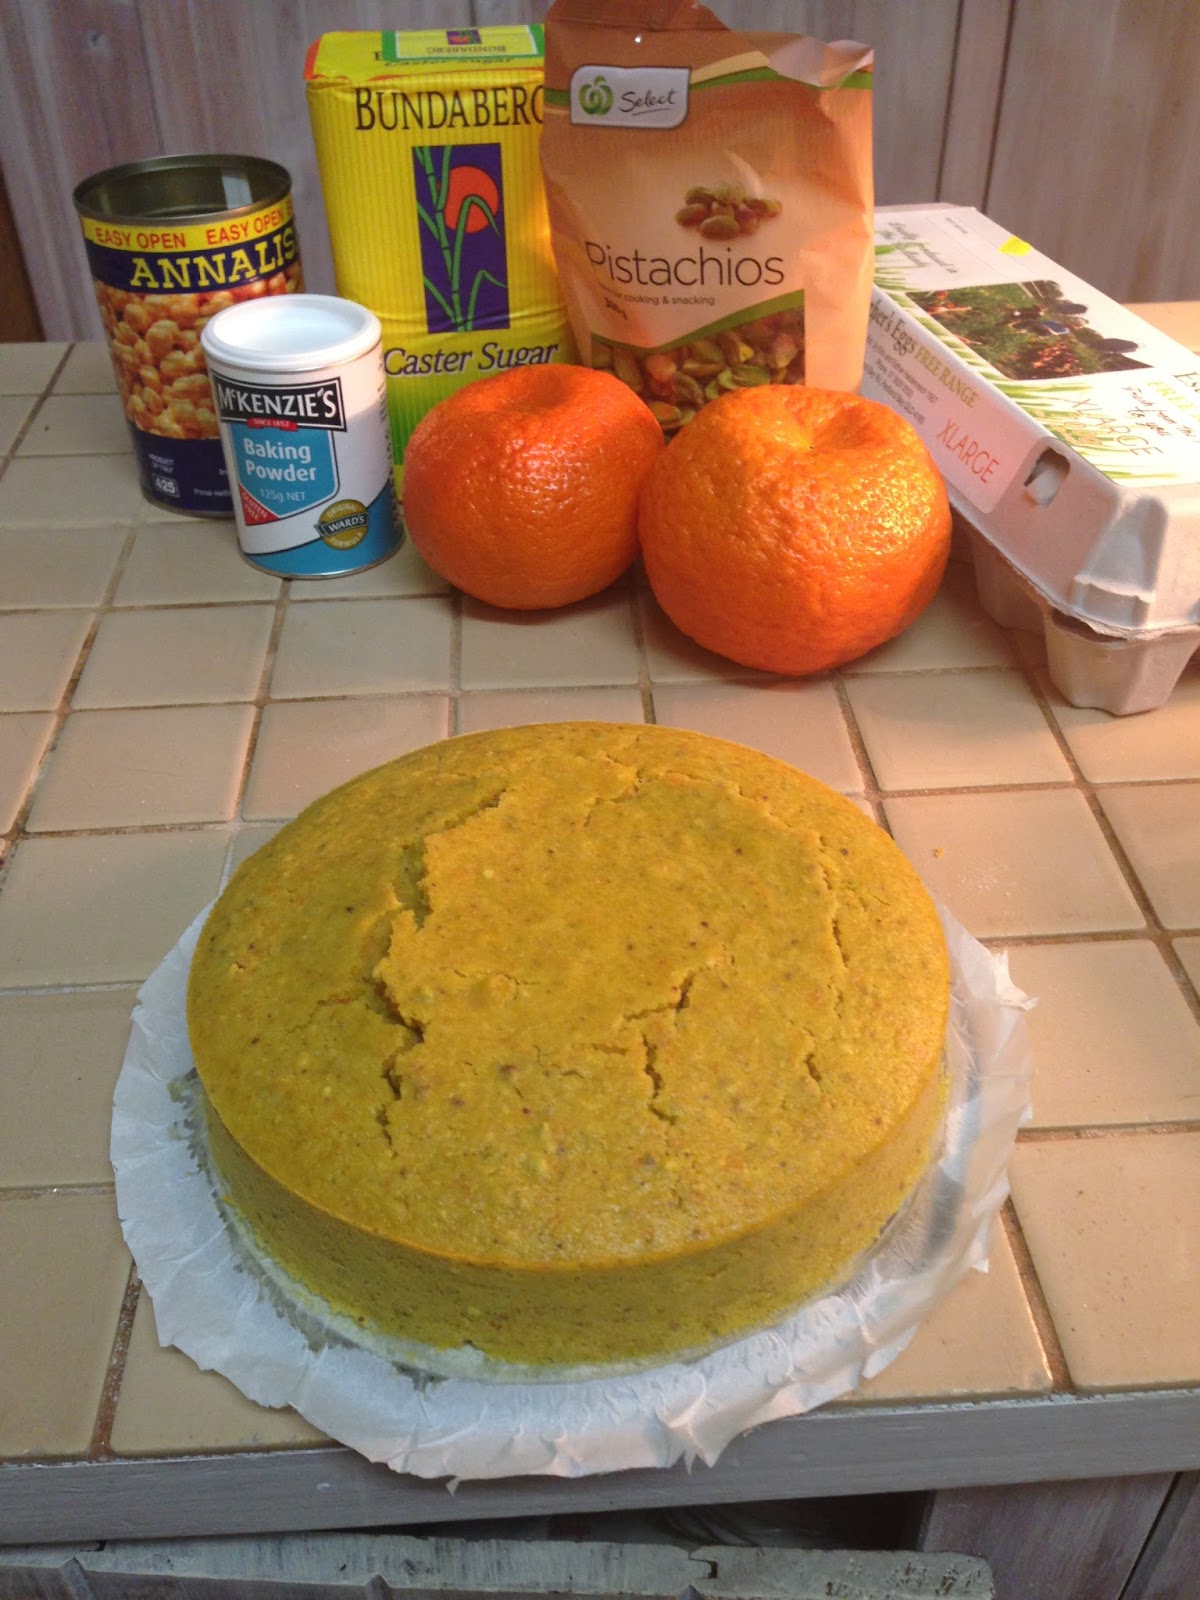
Add to the dream a new cookbook, Super legumes by Chrissy Freer, (bought justifiably because we should be eating more legumes, and here's the website recipe if you want to check the recipe out for yourself, chrissyfreer.com.au/superlegumes-recipe-mandarin-chickpea-cake/  ) and the perfect recipe presented itself, Mandarin, pistachio and chickpea cake.


So tonight I whipped one up, well actually two, well actually one normal one which won't fit into any of my tiny cake tins, so it became two. Making the cake was straight forward and pretty fast, except for having to bring the mandarins to a boil, not once, but twice, and then simmer for 45 minutes. Not that it was hard, it's just that when I want to cook something, I want to do it right now and waiting for the boiling part was frustrating. But moving on from that the rest of the mixing was really straight forward.


Then came the cooking part...
Now please don't think this has anything to do with the recipe, this is all about how I can manage to make what should be the simplest part painfully hard. You see, I don't have a normal oven, this house came with a very old gas upright, most of the top cookers work, but nothing below that. As we had originally planned to rip out the old kitchen and replace it with something all new and sparkly (lets save that whole story for another time), I temporarily bought a glass oven. I'm a glass oven advocate, I find them easy to use, perfect for roasts, and I normally do my cakes in them. It's just that it's a little too small to fit some cake tins in, or if you manage to get them in, you can't easily get them out, so I bought tiny cake tins. So, tiny cake tins mean you need to adjust the cooking time, also the oven cooks slightly different to time than a normal oven anyway, normally shorter as it has a fan going, so I figured, smaller tin, half the mix, and a faster oven, 35 minutes instead of 50 would probably be the go.


To say my estimation was out would be an understatement. It looked well cooked from the top, it had even cracked across the top and was slightly crunchy, and sprung back beautifully when poked. I waited for it to cool down (actually I forced myself to do the washing up because I knew once I sat down with a cup of tea and my cake I wouldn't feel like getting up to a pile of dishes) and then cut a sample slice. Disappointment, it was all gooey in the centre, and most disappointing of all, because I wanted to save my wonderful home grown mandarins (after all there's only about 10 of them in total) to eat fresh, I used store bought ones, and these weren't as bitter as that first unripe one of mine, but nowhere near as sweet as the one we savoured yesterday. So unfortunately the cake has a slightly bitter twang which I don't think would be there with a sweeter mandarin.


Right now, the cakes are back in the glass oven, (note to self, next time try using tiny bundt tins as I think being able to have the heat through the centre will make the cooking more even). I'll give them a little longer and that should dry out the overly moist centre and I'm sure we'll all enjoy it for morning tea tomorrow, dusted with a little icing sugar, sprinkled with a smattering of crushed pistachios and served with a little cream on the side. I'm even thinking of a drizzle of mandarin syrup...Yum!


What have you been baking lately and how did it go?

Saturday 11 July 2015

What's happening in the garden

Today was suppose to be warm and it was, up above 20⁰C, which is warm, even by our normal mild winter standards. This whole winter hasn't been 'normal'. It only started very late in June, with days still in the 20's up till then. Nothing was dying back like it should. Ginger was still green and growing, so too was most of the Turmeric, the Asparagus and the Indian arrowroot still hasn't given up even now. So the garden held desparately onto the last of Summer, through Autumn.And now it seems it's pushing forward, ready or not, into Spring, way too early. We normally finish winter around mid August when our days start heating up, but are offset by westerly winds, and things normally start to "Spring" into action at this time. But proof that Spring may come early is all around the garden already.

The first of the spring bulbs is already flowering


The Blueberries have started budding with new growth.


One Blueberry has even started flowering.


The Macadamia, not to be left out is flowering too.


Asparagus is putting up it's first tentative sprouts.


The nectarine is starting to form buds.


The peach tree is in full bloom already


And earlier Peach blooms are already making way for fruit.


I don't know what this change in timing will do in the garden, especially if we get the sudden cold snap that's meant to be coming tonight. No doubt the new frail leaves on the grape vine will curl up and turn brown, but hopefully the flowers will just go slow until the real warmth arrives.
How's the weather treating your garden?

Wednesday 8 July 2015

A new fence...

Yes, it's been a quiet garden week, only because I've got a dose of tonsillitis, and for once bed is more appealing than my garden.  I know I hinted it could happen, I never thought it would, but maybe there are some out there in gardenland who would like to see our new side fence.

The old one was painted timber palings, on a perpetual slant, albeit some areas a few degrees closer to tumbling than others. It was like that when we bought the little blue shack, and it is surprising its lasted this long when I think on it. Termites had long since eaten out the bases of the uprights which supported the rails onto which the palings were nailed. Recently our neighbour decided to pull out a half dead tree which was close to the fence line, and pulled half the old fence out with it, necessitating a halt to the procrastination surrounding its replacement. Luckily our neighbours were of the same mind as us, and as luck would have it had previously purchased a quantity of sheet metal fencing we term"good neighbour fencing". I don't know the history behind this name, and I don't think it does much to encourage a good neighbourly relationship, except to completely block out one side from the other with six foot (180cm) high sheet panels (although looking at the photos of our often overgrown and messy gardens I can probably understand their thinking). As I said, we were considering this type of fencing anyway, but probably at a maximum height of 5 foot (150cm). That extra is somewhat startling, particularly given that we've placed the panels above ground height on a downhill slope so  that as the soil on our side builds up, as it has considerably over the 8 years we've already been here, it won't build up against the panels encouraging rust during damp times.

The fence itself was a breeze to construct with Hubby doing most of it himself. Firstly tying a string line to the last panel of our fencing we'd already erected from the front of the property running down to just past our banana trees (this is where we ran out of those panels) to the end panel of the bottom fence boardering the road to create a guide to placement.
Hot pink stringline zooming past our existing garden areas
Hubby at work, stringline in place and frames being put in and levelled, vice gripped in place until concreted with some angled temporary timber supports.

Hubby then simply screwed a top and base rail to a set of uprights, dug out holes for the extra length of the uprights could drop down into the ground to the desired height either side, letting the base rail sit perfectly horizontal and spirit level even, then back fill the hole with concrete to ensure it won't move again anytime soon. Hubby then took the screws out of one side of the top rail to allow the colourbond metal panels to slide into place across the hollowed out base rail, and then refitted the hollowed out top rail thus enclosing the panels in a complete frame, with one frame attaching to the next.
Frames lined up and cemented in.
Completed fence from the neighbours side.
Completed fence from our side, fairly hidden from the footpath by our hedges. On a positive its height means our chook pen and enclosure is really protected from the winds that come from that side now.

Out next step is to fill in the gaps under the fence line because as mentioned our block slopes from top to bottom, therefore the gap on the high side as every panel may only be a couple of inches, not enough to let a chook slip under, but on the low side of the panel it is high enough to let a large dog crawl through. We are using treated pine sleepers to do this, propped up be large stakes. The large stakes will serve to double as a vertical growing surface by stringing metal wire between them. This should provide me with a great place to grow climbers like chos (chayote) or even espalier a pear tree, which will hopefully also prevent to much summer sun heating up the metal and making the area hot.

Kookaburras have already made themselves at home, sitting on the fence above one of my small ponds where they like to take baths during the hot weather.
Have you done any construction in your garden lately?

Monday 6 July 2015

A-Z of the little blue shack's garden, let's begin with "A"

I've been watching  the A-Z of Gardening on YouTube. It's interesting because they just focus on one letter at a time, but take what are I think are excerpts from numerous UK gardening shows and put them all together. I always hope to see some things under different letters, some have great information and then some like "F" gave me "fences" as one of the topics. Not the most exciting topic for this plant enthusiast. Following that they spent some time on Fushias, beautiful, but again I'm not really ready for these pretty plants. My focus, if you're new to my garden, is all about things you can eat. Now I'm not saying that I won't stray off into fencing (we've just put up a new side fence, so I may just share that on some quiet gardening day), but primarily I want to share my love for growing food.

While my mind was busy spinning thoughts of which 'letter' will really deliver, the post delivered me something to get my heart pounding, the new Green Harvest newsletter and catalogue. (If you're not local to South East Queensland Australia, do yourself the most delicious gardening favour and have a look at their website greenharvest.com.au. and be amazed by the variety of plants and their great information, by the way, this isn't an advert of any kind, and I don't get anything for promoting them, I just buy goodies from them, and consult their website for advice and inspiration, and really enjoy doing so). Anyway getting back on track, I was reading through their spring planting flyer and discovered I already have most of what they were suggesting growing here in my own backyard, or alternatively I've already tried it, and killed it (not all things work first go...). I had forgotten just how many plants I have accumulated and learnt about since starting to garden 8 years ago.

So I thought, why not do my own A-Z list, at first I was thinking to myself, "Gosh I don't have anything before C", but then I sat down and looked out the window.

So enough about how I got here and why, lets get started, drum roll please.....

"A" is for:

Acerola Cherry

Now me growing these was a stroke of good luck because I bought them when I was still very new to gardening, and thought I was buying your stock standard type cherry. It's just as well, because in our subtropical climate on the coast, we'd never have any cherries produced as we don't get anywhere near the chill hours required. These are a great option for a warmer climate, easy to grow (our lives out the front where we rarely bother to water, rarely mulch, and only ever remember to fertilise once in a blue moon),and taste good too. Our neighbours have a brazilian cherry, another type of tropical cherry type option, but the fruit on it are so bitter compared to these. Ours didn't fruit for almost 5 years, but I have seen them fruiting on fairly young trees at the nursery.

Pink flowers are a sign of coming fruit,

Green Berries follow on from the flowers fairly quickly.


Cherries are ready to pick when they have turned red and darkened a little.

Apples

We have two subtropical apple trees that are about 5 years old. One is a Golden Dorsett, the other is now a mystery as I've lost the tag, and can't remember what it is. It is however not the same variety as that is one of the suggestions with Apples, you get better pollination and therefore crops supposedly by planting not only a second tree, but a tree of a different variety. These were bought as grafted trees that were about a year old. Up until last season ours had only produced very small, about small apricot sized fruit and very few of them. This last lot however, we made sure the trees had regular feeding and were kept well mulched. We also ensured we bagged the fruit from the time they were really small to make sure we avoided damage by fruit fly or any other pests and we had good results. With Queensland fruit fly a major problem the previous season, I'd been trying out different options on all my fruit to see what worked best. The mesh bag was ok, but because it is softer, with rain or wind it can get very close to the fruit, enabling the fruit to be stung through the mesh, although in fairness we only lost one, and it was a fairly full bag as you can see below, so for value we would do these again. We also tried pest guard bags from Green Harvest as these had been really helpful with the nectarines and peaches, but I find it frustrating not being able to see the fruit and they seemed to take longer to ripen. The best results came from the fly screen mesh bags and sleeves, these were easy to get on, held their shape well, but are the most expensive option. All these came from Green Harvests website, where I bought a kit with various options in it to try them all out. It also came with some exclusion netting and seemed a good value option (http://greenharvest.com.au/Other/Specials.html )
Apples on the unidentified tree, bagged to protect from fruit fly and other pests


Apples on the Golden Dorsett, this bag was the easiest to use, made from what looks like fly screen wire, available from Green Harvest.

One of the apples minus it's covering bag while being checked.

You can grow apples from seed, fairly easily but they say that you may not get a fruit anything like the apple you took it from. Whether this is because of the pollinator or because of genetic throw backs, I'm not sure, but it hasn't stopped me from giving it a go. I've got four plants grown from a supermarket apple seeds. One of my homestay students kindly sprouted the seeds in wet tissue as her grandmother in Russia had taught her and I then carefully planted them out and have been repotting as they grow since. They are now about 2 years old, only small, smaller than our grafted trees were when we bought them but growing well and due for another repot.
The apples grown from seed as seedlings

One of the seedlings on the potting bench 6  months on.

Arrowroot

see "Q" for Queensland Arrowroot and "I" for Indian Arrowroot (sorry, you will have to be patient, I have to hold some of the good stuff back for the hard letters, goodness only knows what I'll be able to come up with for X & Z, time for that later though)

Artichoke

 See "J" for Jerusalem Artichoke and "C" for Chinese Artichoke

 Still to come ... more "A" for Asparagus


What "A's" are you growing in your garden?

Saturday 4 July 2015

Harvesting Late June Early July

Apart from the large quantities of cherry tomatoes, and the first of my peas,  I'm also still harvesting lots of chillies. The small and very hot birds eye chilli grows like a weed here. From the first plant we've been lucky enough to have them set seed again every year. In addition to these I have a chilli which isn't as spicy and a bit larger, grown from a store bought large yellow banana chilli, but not resembling the parent fruit in any way, It may be more like a Cayenne or Joe Parker chilli. Again I think the first plants descendents may have crossed with birds eye, or reverted to another former type, as the first crop was mild enough for me to nibble on raw, but subsequent generations have proven too hot. I usually try to make up some chilli jam, but any excess including this lot, I've been giving away, rather than see them wasted.

Many of my underground root vegetables are now coming into their own. We harvested most of the Jerusalem artichokes earlier in the month when there stems started to brown and die off. Last year these were a really experimental crop for me, and in fact I was so put off at the time by their weird appearance, what few tubers I harvested from the original two I'd bought and planted, were all replanted into seedling pots, probably about a dozen in total, and then planted out into the garden beds in summer. The thing with these though is even when you think you've got them all, you suddenly find more which happened when I was digging the soil over to plant something else just the other day. I've collected almost 3 shopping bags full of these and been eating them this year. They say to cook them like a potato, but my favourite is to sauté them chopped finely in butter. Yum! I've kept about 50 small tubers (just put into snap lock bags with some clean moist, but not wet potting mix in a cold dark place) for replanting come spring.
More Jerusalem Artichokes found while digging around.

Jerusalem Artichokes dug out and ready for storing.


No doubt I'll probably find more again when I start harvesting the Indian arrowroot which I'd tucked into the same garden bed, but the leaves on these haven't started to brown yet, so it may be a few more weeks.
 Its finally starting to get cold enough for the foliage on the Turmeric to start dying off, signalling that its time to harvest the roots. Not all the Turmeric is ready, it seems to just be a couple of pots, the plants in the garden beds are still very green, so they'll be a while off yet. Again I've kept some to use ourselves, and then given any excess away. I haven't yet put any aside for replanting, but I've still got a lot more plants to harvest. Also just a word of warning that yellow colour stains, so it will stain your hands and fingernails for a few days if you get it on you, and I have no doubt would definitely stain clothing or tea towels.
Freshly harvested Turmeric
And last for the moment, and most unusually, it was time to unveil the tubers from the Chinese Keys (Krachai). To say I was surprised when I dug these up was an understatement. The tubers that I had bought and planted last year were so small and fine and grew more that looked the same, so I was delighted when they were so much bigger and fleshier this year, and it looks like I've got enough that I can eat some and still store some for replanting.
Krachai tubers harvested this year, This was from just one pot.

 What have you been harvesting in your garden lately?